OzySEO's town   A streetscape in OzySEO's "Sin City". Coordinates: 527.202N 1757.257W 1.10a 238.7


A review of some key scripting commands

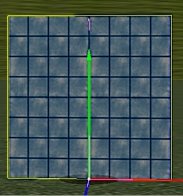
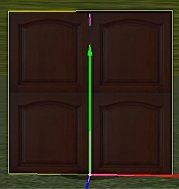
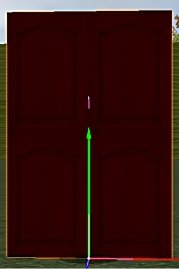
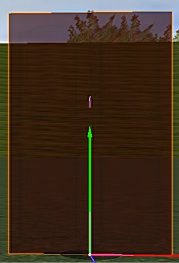
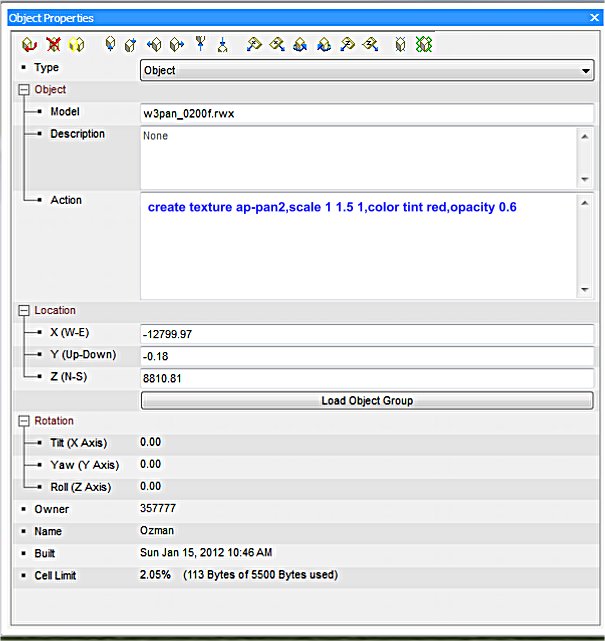
As AW evolves, the ability to manipulate objects using the growing list of commands, triggers, and such enables a builder to take a simple object, for example, a wall part, and really doctor it up quite considerably. In this issue of Building Tips, we will take a simple 2D wall object and add a variety of different commands and variables to show what you can do. Let's begin.


Manipulating a wall.

blank wall bit

Here is a blank 2D wall part, w3pan_0200f.rwx, which may be found in the Yellow object yard.

texture added

The first thing I want do to is give this wall some texture. So in the action box in the Object Properties I type create texture ap-pan2. This texture may be found in the Yellow Texture Yard.

Wall is scaled

The wall isn't quite tall enough to do what I want with it, so I will use the scale command to lift it up a bit. In the action box, I would add this to the create command already there create texture ap-pan2, scale 1 1.5 1. The wall is now 1.5 times higher than the original.

Wall is color tinted

Now that the wall has the texture I want, and is the right height, I'm not quite happy with the color of the texture I selected, so I will use the color tint command to make the texture just a bit redder. In the action box, I would add this to the create command already there create texture ap-pan2, scale 1 1.5 1, color tint red. The texture is now the tone that I want, a sort of reddish brown. You can experiment with this and you will see that you have pretty good control on what you want your object to look like.

Wall is made translucent

Now that the wall has the texture I want, and is the right height, and the right tone, I want to use the object as a sort of window, so I will have to make the all translucent. In the action box, I would add an opacity command to the create command already there: create texture ap-pan2, scale 1 1.5 1, color tint red, opacity 0.6. There. That's ready to use now for my build.

The Object Properties Box

If you look in the Action text box in the Object Properties Box, you can see the code that makes all this happen. Note that I didn't use any spaces between the commands, but each is separated by a comma.

Some essential tips!

When you string a lot of commands together like the example above, you must put a comma between each of the commands. AW commands are easy to use, but very unforgiving with typos and syntax errors, like forgetting to put the commas in. Remember too, that each character you type in the action box takes up cell space, so if you have lots of commands and variables in the action box, for a number of items, this will restrict the amount of objects you can have in any one 10 X 10 metre cell.

We will continue having fun with this wall in the next issue of the Gazette, with more commands.

A tip for AW Version 5.2

You may have noticed what when you first used Version 5.2 of the program, that the tool bars were all different and set on the bottom of your screen. You can place these new tool bars (called Heads Up Displays - HUDs) anywhere you want them on the screen. ChrisPeg, AW's chief programmer explains how.

Moving:
Hold the Right Alt key down, Right Click once into a frame and drag-move them to any position on screen. Once you release the mouse key and the Right Alt key, the position is locked again.

Alignment and Orientation:
When you move a frame to the left or right edges of the screen, it will auto-align its orientation vertically.
When you move a frame to the top or bottom edges of the screen, it will auto-align its orientation horizonal.
To override this kind of alignment, hold the Shift key down while moving the frame to either edge of the screen.

Center:
To center a frame horizontally, again hold the Right Alt key down, and Double Right Click into the frame.
To center a frame vertically, hold the Right Alt key down along with the Right Ctrl key, and Double Right Click into the frame.

The relative screen position of the overlay frames is independ of the screen's dimension. Whenever the 3D viewport window gets resized, the position of the HUD frames will remain at their relative position to the edges of the screen. [Ed. note: Thanks ChrisPeg :-)]

Do you have any questions on building?

Does anyone have any building questions they want answered or do you have some tips you want to share? Please contact Ozman and also to give feedback on this article, particularly if there are any mistakes. He is doing this from experience. And as always, be sure to check the AW Help page and the related AW wiki pages for further help.

For new builders, be sure to visit AWNewbie, and AWSchool worlds for very good tutorials, on-line help from qualified teachers, and lots of very good objects.